Original Kit:
Beverly Hills Cop 1972 Nova
Made By:
AMT (kit #836)
Scale:
1/25

Other 1980s Movie Models

Ghostbusters Ecto-1
Sharky‘s Machine Dodge Diplomat
Back to the Future DeLorean
BTTF DeLorean (Review)
BTTF2 DeLorean (Review)
Transformers Optimus Prime
Ghostbusters Ecto-1 (Review)
The Terminator Police Car (Review)
Gotcha! Citroën 2CV
Dirty Dancing 1957 Chevrolet
Star Wars Speeder Bike (Review)
RoboCop OCP Ford Taurus (Review)
Who Framed Roger... Benny (Review)
Blues Brothers Bluesmobile (Review)
Christine 1977 Plymouth Fury (Review)
Batman Batmobile
Never Too Young to Die Corvette
The Terminator Custom Pickup
Tron Light Cycles (Review)
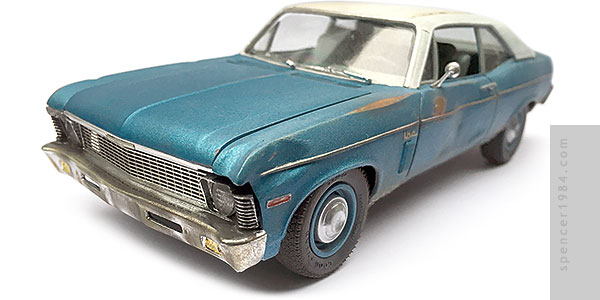
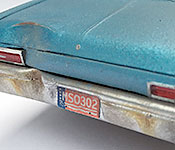
Arguably the biggest problem with replicas of beaters from movies and TV shows is that they're always too clean. Even when they have rust and dirt painted on, the bodies are still arrow-straight to allow for multiple reuses as a way to get the most out of a particular casting. The reality of economy is that a company like GreenLight can recoup their losses a lot easier when their Beetle is clean and can be used for myriad releases, as opposed to screen accurate but useless for anything other than that one role. One of the more famous victims of this has been Axel Foley's "crappy blue Chevy Nova" from Beverly Hills Cop. Despite the frequent attempts by several manufacturers, there's been no way to really capture the beat-to-hell look of this car on a commercial level.
Knowing that whatever I started with was going to require a lot of work, I opted to use the officially licensed kit by AMT. I had already been through this kit once as a learning experience, and took those lessons into this build.
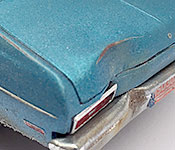
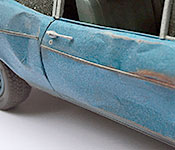
First up was getting the body together. I started by correcting the roof pillars, which were done by cutting a thin slice from the B pillar and wing window support, then straightening them to remove the extreme bow. The hump in each C pillar was sanded smooth. Then I sanded off the hood vents, taped the hood and front fenders together, and used this as a guide to glue the fenders in place with everything lined up correctly. I also made a non-SS rear fascia from flat styrene stock. Once these new parts were on, I made some foil copies of the largest dented areas, cut out the body where these were to be placed, and glued my new aluminum panels over the holes in the plastic. The foil dents more realistically than heated plastic, and could be blended into the existing body by wet sanding the edges. To add strength once the damage was done, I filled the back of each dented panel with two-part epoxy. Smaller dents were simpler, and carved directly into the plastic. Finally, I removed all of the cast-in trim including the door handles and wipers, and added a set of fender gills made from small quarter-round styrene stock.
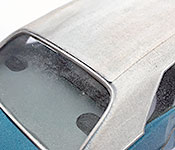
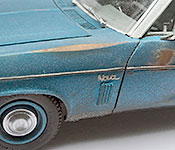
With the body modifications done, I was ready to start painting it. I put down a layer of red primer, then a layer of Dullcote, then gray primer, and finally the color coat. Doing this let me sand through in the creases to recreate the paint/primer/rust look from the movie car. I debated what color to use for the blue, since what we saw in the movie was supposed to be the result of years of sun fade and abuse. I ended up going with Model Master Nassau Blue, which was readily available and after weathering I thought would make a passable representation for the actual '70 Nova color Astro Blue. It's not a perfect match to the movie, but I did feel somewhat better after seeing that GMP apparently had a similar thought with their diecast. The roof was laminated with masking tape to get the vinyl texture, with a few small creases and rips to show its age, and painted Reefer White.
New drip rails and the trim around the base of the top were made from thin styrene rod stock. The side trim was used from Model Car Garage's PE set, which was especially nice in that it could be bent to follow the unique contours of this car. The rubber strip was cut from vinyl tape and carefully centered on the battered side spears. Door handles came from Fireball Modelworks, with locks from a set of chrome stickers. I cut the rear lights off the bumper, and mounted them in the body separately so that the left one could be angled to match the dented rear panel. To finish the rear end damage, I heated the rear bumper over a candle and pressed it into a corner of my work bench. The front bumper got to stay straight, but I did cut out the lower openings and removed the grille, top trim, and the eyebrow over the left headlight. The grille was replaced with the one from the MCG set, and I scratch built a new upper trim piece to glue to the leading edge of the hood. Fortunately, MCG includes a hood badge in their set, so I didn't need to save any of the old one. Molotow Liquid Chrome and silver paint fixed any of the spots where I damaged the plating.
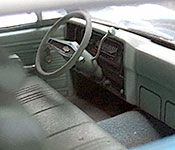
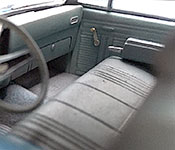
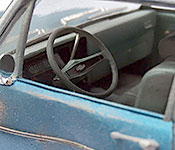
The interior had to be downgraded from the SS to baseline. I replaced the front bucket seats with a bench from Harts Parts Resin as I did with the Thinner Nova, but the light color of this interior meant that the different patterns between the front and rear seats were now really obvious. I took the back seat from a Revell Nova, which had the right pattern but needed to be shortened and narrowed to fit the AMT tub. And since I was already robbing the Revell kit, I also took the dashboard since its better detailing would look nicer in the light color. The arm rests were used from my old '69 GTO, and although they were a little big they still better than the flat cast-in pieces. Final details include a parts box steering wheel with PE center logo, scratch built shift and directional levers, scratch built floor mats, MCG pedals and window cranks, and Detail Master rear speakers. Carpeting was made from a sheet of light blue fuzzy paper, and the rest of the interior was painted Model Master Ice Blue. Dullcote, pastels, and chalk gave it the appropriate "used" look.
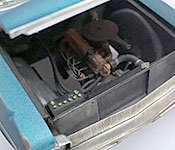
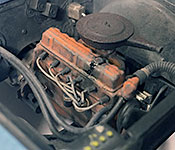
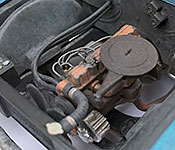
In the movie, the Nova had no fender badges to indicate its engine size. This likely meant that it had either the inline 4- or 6-cylinder, with a slightly higher likelihood of the six based on its performance at the traffic light. Options for straight sixes of this vintage are kind of limited, though. I had heard good things about Model Car World's resin part, so I decided to give that a try. It turned out to be a decent base, but required substantial reworking to get to what I wanted. First to go was all the cast-in details like the starter, distributor, and coil. Being a solid block of resin actually helped a lot here, as I could simply cut off the parts and carve in the missing details without having a hole to be filled like I would have had with a hollow styrene assembly. I also reconfigured the oil pan to the correct style and cut off the transmission. A new Powerglide from B-N-L Resins replaced the original, and like most of their parts had excellent detail and required minimal cleanup. I scratch built replacements for most of the parts I cut off, with the exception of a parts box oil filter and carburetor. The belt assembly, fan, alternator, and air cleaner were used from the MCW Resin kit, and while they all needed some work they were not bad at all. The engine block, belt assembly, and intake were then painted orange. The radiator hoses were made from styrene rod and guitar wire to look like replacement generic hoses, and the heater hoses were made from wire. Flat and Grimy Blacks were used for the metal and rubber components, respectively, and everything under the hood was heavily weathered with drips, stains, and rust.
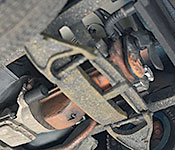
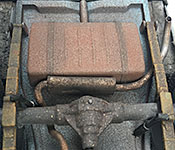
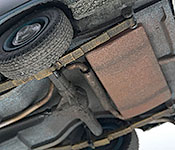
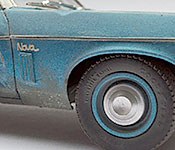
I didn't like the way the front suspension looked with its stubbed lower A arms, so I cut them off completely and replaced them with a set from my parts box. The upper A arms and spindles were less visually critical, so I made those out of basic flat stock so I could be sure they'd be strong enough to hold the car. The rear axle is mostly stock, though I did make a set of shocks since the kit-supplied parts looked pretty rough. I also used the muffler and tailpipe out of the kit, cutting off the second tailpipe and both inlet pipes. The new pipe was made from 0.080" styrene rod, carefully bent to match the original pipe and mate up with the header pipe in the engine bay. Once I got the body mounted, I filled in the gaping holes around the rear wheel wells and between the body and chassis with flat styrene stock. The kit-supplied tires were sanded down to remove some of their tread, then mounted on Scenes Unlimited wheels with Harts Parts Resin hubcaps.
Weathering was a big part of this model's character. I used a combination of regular paints, AK Interactive and Vallejo effects paints, Tamiya Weathering kits, and my old standbys chalk, charcoal, and pastels to age it. The final touch was a custom Michigan license plate I drew up in Illustrator and printed onto card stock.