Garfield ©1978 PAWS, Inc. Used with permission
Ready to start assembling your first kit? Great! Although the myriad tools, paints, glues, and parts in an experienced modeler's toolbox seems like a huge investment, there are really only a few things you'll need to get started. Over time, you will be able to decide what works for you and what doesn't, but these are some of the basic tools and techniques you should begin with:
The Basic Tools
| What should I get? | Where can I get it? | Example |
|---|---|---|
| Knife | Hobby, Craft, & Office Supply Stores | |
| Glue/Cement* | Hobby & Department Stores | |
| Tweezers | Hobby, Department & Dollar Stores, Pharmacies | |
| Small Scissors | Hobby, Department & Dollar Stores, Pharmacies |
*There some different types of glue you will want to consider:
- Liquid Cement - a.k.a. Plastic Weld, is good for tight joints between bare plastic
- Tube Glue - Can be used in imperfect joints, and parts can be repositioned after they are placed. Like Liquid Cement, it works best between bare plastic parts.
NOTE: Testors makes two types of tube glue: the "regular" (orange tube) and the "safer" (blue tube). From experience, the regular works far better anywhere there is stress (wheels, suspension, etc.). The "safer" does not dry as solid and tends to sag. - Superglue - Excellent for quick bonds between parts, but cannot be repositioned. Also, it sticks to everything, including tools and you. Best if used sparingly.
NOTE: Some of the best superglues are those found in Health/Beauty sections of stores as "Nail Glue" for fake fingernails. They are the same product as hobby superglue (cyanoacrylate), but are usually cheaper. - Amber Glue - a.k.a. "Walther's Goo" or "Ambroid Cement", this will hold anything together, including glass and wood. The drawback is, it is thick & yellow, so it must be used in hidden areas, plus it is very slow drying.
- White Glue - Glues like Elmer's are excellent for installing windshields, canopies, and lights because it dries clear without "frosting" the plastic like other glues can. It does not form a strong bond, though, so it must be used in no-stress areas.
- Epoxy - 2-part epoxies create the strongest bonds between dissimilar materials, and come in several varieties so you can select the final color and cure time that best fits you. Epoxies can be very messy until they cure, and have little to no holding strength during this time. This makes it easy for parts to fall out of alignment, which can be disastrous to your project as there is little chance of moving the parts once the epoxy has fully cured.
If you plan on painting, you will also need the paints, brushes, toothpicks for small detail work, and brush cleaner/thinner. You may want to look into an airbrush kit, especially if you have used an airbrush before.
In addition to these necessities, some other things you may want to consider: sanding paper, a set of small files, a drill with various bits (.010"-.100"), a small saw, clippers, and a magnifying glass.
Choosing A Kit
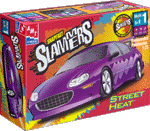
First, pick what type of model you want to build. Car? Airplane? Ship? Spacecraft? There are several genres out there, so you should be able to find something you like without too much hassle. If you have absolutely no idea where to start, try going to a local hobby or craft store, and look through the models they have in stock. These stores usually have a good selection of kits that are pretty basic, so you should get some ideas there. Snap together kits might be a good place to start. Some kits you may want to stay away from as a beginner include skill level 3 or higher kits, resin and vinyl kits, or anything that has over 200 pieces. These types of kits can look impressive when they're finished, but the amount of work required to build them can be overwhelming.

Two other options are prepainted plastic and diecast (metal body) kits. These kits are good if you want to try something beyond a simple snap kit, but are not yet comfortable with spray or airbrush painting - the bodies in these kits are already painted and decorated, ready for assembly. Many of these kits screw together, so gluing is minimal as well. One downside to diecast kits is that because they have metal bodies, modifying these kits is more difficult, especially for beginning modelers.
If you're serous about it and would like some further recommendations on current kits, you may want to check out a modeling magazine such as Amazing Figure Modeler, FineScale Modeler, Model Railroader, or Scale Auto.
Building It
You've got the kit and the tools, so now what? First, find a clean, well-lit place to build your model, away from people or pets that may knock pieces around. If you will be gluing or painting, make sure your work area is well ventilated (this is both for safety and practicality: glue and paint dry faster if they can be vented). You'll ideally want temperatures around 70-90°F (20-30°C), low humidity, and a gently moving air flow to help the glue/paint gas out better.

When you are removing parts from the plastic trees, do not twist them off. This will often tear off a piece of whatever part you were trying to get. Instead, cut the part off with a sharp knife or clippers, and carefully trim any excess plastic away.
If you have to choose only one type of glue, I would reccommend tube glue, and use it sparingly. It's an old cliché, but a little really does go a long way. Your finished results will be all the better for a light touch.
For painting, remember to use multiple thin coats instead of one heavy coat. Building up the paint slowly will ensure an even finish and help prevent runs, drips, and other flaws. Keep wet paint safe from dust and debris - a plastic box large enough to fit over your painted parts woruld be good for this. Just make sure you don't make an airtight seal around the part - ventilation is needed to dry paint.
Finally, when the model in finished, unless it was built as a toy, do not touch it excessively. The natural oils in your skin can damage a painted surface, plus the more it is handled, the more likely it is that something may be broken off.
Other than that, remember to have fun. Hobbies are supposed to be enjoyed, not labored over. Don't be afraid to try something new: the guidelines here are to help get you started, but if you have an idea for a better way to do something then give it a shot.