Original Kit:
Volvo F12 Intercooler Low Roof & Kenworth/Challenge Transit Cement Mixer
Made By:
Italeri (kit #3957) & AMT (kit #1215)
Scale:
1/24 & 1/25

Other Transformers Models
G1 Sideswipe
Transformers Bumblebee
Robots In Disguise Bumblebee
Robots In Disguise Drift
G1 Hound
Robots In Disguise Prowl
G1 Skids
Robots In Disguise Side Burn
Revenge of the Fallen Mudflap
G1 Red Alert
G1 Huffer
G1 Nightbeat
G1 Siren
Robots In Disguise Sideswipe
Other Comic & Manga Models

Misery Machine
Avengers Lykan HyperSport (Review)
Cyber Formula Stealth Jaguar (Review)
Cyber Formula Knight Savior (Review)
The Circuit Wolf BMW 3.0 CSL
Transformers G1 Prowl
Tekkonkinkreet Colt Galant
Cyber Formula Asurada AKF-11 (Review)
Batman #20 Batmobile
DC Bombshells Batgirl (Review)
Teen Titans #9 Batmobile
Dilbert Carbicle
DC Bombshells Wonder Woman (Review)
Over Rev! Toyota MR2
Other Cartoon & Anime Models
G.I. Joe RAM
Tiger & Bunny Double Chaser (Review)
Ben 10 Alien Force Kevin‘s Car (Review)
F&F: Spy Racers Crawler (Review)
MOSPEADA VR-052
Lupin III Fiat 500
Batman:TAS Batmobile (Review)
Rick and Morty Space Cruiser
Zootopia Police Cruiser (Review)
WALL·E
Roadster Racers Goofy (Review)
Roadster Racers Daisy (Review)
Cars 3 Cruz Ramirez
Rugrats Movie Reptar Wagon (Review)
Other 1980s Movie Models

Tucker: The Man... Tucker (Review)
Never Too Young to Die Corvette
Stroker Ace Thunderbird Stock Car
Ghostbusters Ecto-1 (Review)
Hairspray 1961 Corvette
The Terminator Custom Pickup
The Philadelphia Experiment Charger
Batman Batmobile
Gotcha! Citroën 2CV
Explorers Thunder Road
Night of the Comet 1953 Buick (Review)
Indiana Jones and the Last Crusade Bike
Star Wars Speeder Bike (Review)
Gone in 60 Seconds 2 Slicer
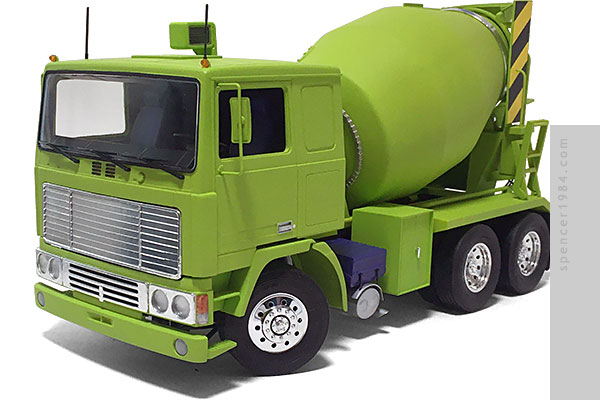
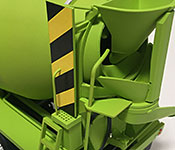
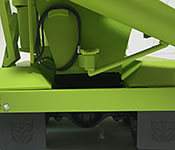
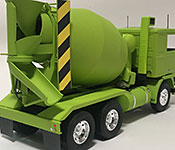
The Constructicons have long been on my "wanted" list, but market prices had kept them out of reach for me. Thanks to Round2 reissuing some of their old construction kits, building replicas of the team suddenly become a much more realistic goal. Then Italeri repopped their old Volvo F12 kit around the same time as AMT's Kenworth/Challenge mixer, and it was too perfect for me to not build the mad materials fabrication specialist Mixmaster.
Not that it was as simple as dropping the mixer onto the truck and calling it a day. For one thing, the "Challenge" marque was particularly apt given the age of the tooling and substantial cleanup needed to get everything to fit together. The drum was particularly tough, as it came in two halves that were both warped out of the box. to help myself out, I cut a circle of heavy styrene and fit it inside the drum near the open end, then used a whole lot of liquid cement and rubber bands to try to force the drum as round as possible. Once it was dry I added some filler along the seam to help smooth it out even more, and while theend result is much better than it was originally there'still a faint line if you know where to look.
The frame supporting the drum was a bit easier, but talking to other modelers it seems that the method you use to assemble it makes a big difference: I glued everything together first, sanding and smoothing as I went along and not even thinking about paint until it was done. Assembling it per instructions, particularly if you wish to apply a more elaborate paint job with different components painted different colors, can lead to headaches when it's time to pull everything together. I also didn't bother trying to include the chute extender, as it made for a better match to the G1 toy without it. I did add a set of wings to the side of the rear drum support, which not only helped visually bulk it up but also made it hard to see where the drum rail didn't quite line up with the carrier rollers.
Moving to the Volvo, the biggest change I needed to make was converting it from a single to dual rear axle. The frame was long enough to work for either, so I was able to limit my work to the suspension itself. I took the mid axle that was left over from my Duel Peterbilt, the stock rear axle, and scratch built a walking beam to carry everything. The tires are all Italeri - six from the kit and four more from a parts pack - mounted to wheels from Revell's Peterbilt 359. The Pete had a unique design where a flange molded as part of the tire formed a spacer inside each wheel, and I had to recreate these spacers from 0.080" styrene so that they would fit the Italeri tires. The short driveshaft was out of the parts box, while the one from the engine to the forward axle was from the kit but shortened. The rest of the chassis went together pretty much straight out of the box, including the engine and fully functional steering.
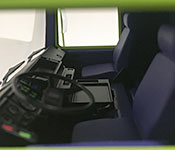
The cab interior was assembled straight out of the box, and I was very impressed at how well everything fit together. I had heard that the windshield fit was a problem, but mine dropped into place with little more than cleaning up the parting seam along the edge of the glass. To further make this look like the original Mixmaster, I sanded off the Volvo script under the windshield and replaced the grille with a scratch built panel made from Evergreen clapboard siding and a couple of pieces of styrene rod. By retaining the stock surround I didn't have to fiddle around with getting it to fit the cab, and using the original mesh as a backer helped provide the correct curve to fit the contours of the cab.
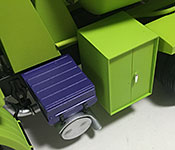
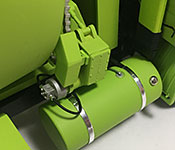
The rest of the assembly was a mix of kit parts, parts box items, and some scratch building. I moved the battery box forward on the left side of the frame, and made a cabinet to go immediately behind it. The same location on the right side was taken up by the gas tank, so I left that alone. The rear fenders were out of the mixer kit, modified slightly to fit the Volvo's chassis. Small spacers were added to the top of the frame to support the mixer assembly, and frame extensions were added to the back so that I could add a full-width bumper to the back of the truck. the water tank was supposed to be mounted to the side of the frame when it was part of the Kenworth, but the Volvo didn't have enough room for that so I made a new frame and mounted it crosswise between the can and drum. The side ladder, water pipe, and platforms all had to be modified or scratch built to fit the new arrangement of parts, but in the end I think everything cane together nicely.
Trying to figure out what colors to use took a bit of planning. I needed something safe to use on plastic, repeatable for future projects, and cheap enough that getting enough paint to cover six large construction vehicles wouldn't kill the project before I even got started. I went with Design Master's matte "Olive Bright," which struck me as a near-perfect "Constructicon Green" and was available in 12oz cans (compared to the usual Testors or Tamiya paints at 3oz & 100ml, respectively). The purple areas were done with Tamiya TS-24; straight out of the can for the battery box, and with a layer of Dullcote for the interior. The frame and several interior bits were painted semi-gloss black, and the engine and other details were done in various metallic colors. Bare Metal Foil was used for the grilles and headlight surrounds, while paint and tape were used for the rest of the chrome and polished metal details.
Final details include a set of Decepticon mud flaps, another tiny Decepticon symbol in the center of the steering wheel, and custom printed caution stripes for the wings on the sides of the drum. The taillights are craft gems colored with Sharpie markers, and the water hose is a coil of wire painted and finished with crimp beads.
.
.
.