Original Kit:
'33 Ford Street Rod
Made By:
Monogram (kit #2480)
Scale:
1/24

Other Music Models
Little Red Corvette
The Outsider ‘69 Charger
OutRun Testarossa
Hatsune Miku
Pretty Fly (for a White Guy) Ford Pinto
Bang Bang Challenger
New Monkees Mustang GT
Circles Around this Town Dodge
ZZ Top Eliminator
Hate You Hummer H2
Grease White Lightning
It's Yourz Viper
Stylo Camaro
Dirty Dancing 1957 Chevrolet
Drag it Out C8
Live a Little, Love a Little Meyers Manx
Elvis ‘55 Fleetwood (Review)
ZZ Top CadZZilla (Review)
Raiders Coach
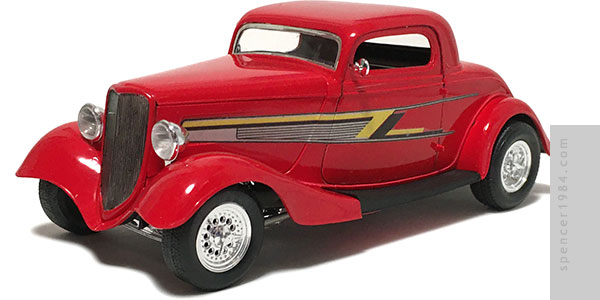
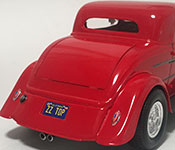
I started this project with a gluebomb I picked up at a toy show. I had planned to do a repeat of some previous models, stripping off the worst damage and rebuilding it with the occasional parts box item to finish it. But after getting it home and doing a closer inspection, it was worse off than I thought. Body parts, one valve cover, and some chassis components were missing, the chrome was shot, and what had been assembled was too heavily gooped up to salvage. So I instead went with Plan B: take Monogram's "'33 Ford Street Rod" (a repop of the ZZ Top car minus the branded valve covers and air cleaner) and supplement it with Eliminator parts.
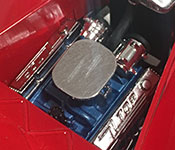
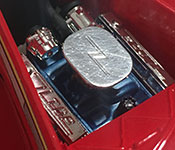
Construction was pretty straightforward, albeit quirky. The engine started life as a Pontiac V8 when Monogram first released the kit back in the '60s, and the retooling done in the '80s to make it look more like the small block in Billy Gibbons' car left it a weird hybrid. Since total accuracy was already out, I decided to paint it a kind of "Ford Tribute" blue to contrast with the red used everywhere else. The transmission was painted using Citadel's "Iron Warriors" Base, which has become my new favorite dark metal color. I was able to locate a second valve cover from a fellow modeler with another partial kit, stripped it and the air cleaner in some Super Clean, and rechromed them with Bare Metal Foil and a Gundam Marker. The exhaust manifolds didn't fit all that great, but could be coaxed into place with a little work. There's no fan, but since you can't really see the front of the engine anyway it's no great loss.
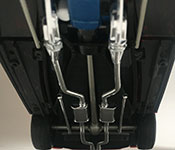
The chassis was, for its time, a pretty elaborate affair: separate front and rear axles, split wishbone, drag link, traction masters, tie rod, and exhausts. It looks good on paper, but getting everything to fit wasn't quite so straightforward. The front end was a combination of vague and finicky, with few positive locators and the ones that were there getting in each others' way (according to the instructions, near as I can tell, the tie rod, oil pan, and suspension arms all need to occupy the same horizontal plane). I also discovered that when fully seated, the front axle looked a bit too low for the Eliminator. I put a thin shim of plastic between the front crossmember and spring - similar to what I did on the rear axle of White Lightning - and then rebuilt the suspension and steering components around that. The exhausts were a hair too long, making the support at the rear sit against the inside of the body rather than on the rear frame crossmember. I was also seeing some interference between the forward pipes and angled frame rails. So I cut out those pipes, gluing the collectors to the headers and the muffler/tailpipe to the rear crossmember. When everything was nice and solid, I glued the middle pipes back into place, swapping them end-for-end so that the longer straight sections were towards the front of the car and better cleared the frame. Everything was painted in various shades of black and metallics, and the pipes were touched up with more BMF and Gundam Marker.
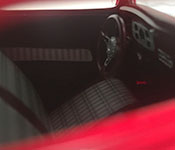
Little of the interior can be seen through the narrow windows, but I still wanted to get it as close as I could. The easiest place to see its color was in the video for Gimme All Your Lovin', where it appeared to be a dark rust red with white plaid inserts. I asked off the inserts, then painted everything Tamiya TS-69 Linoleum Deck Brown followed by TS-8 Italian Red. This got me pretty close to the color I wanted, and the headliner (along with any touch-up work) was done with a custom mix of Apple Barrel Flamenco Red with a drop of black. I made up a set of custom decals for the seat and door inserts, applying those over the masked-off white plastic. Decals generally don't stick to plain plastic all that well, so I used a dot of watered-down white glue to give the adhesive a little extra boost. The few interior details were painted silver and black.
As was common for models of 30s cars, the roof was a separate piece broken at the beltline. I have yet to find one that lined up all that great, though, and this was no exception. As with the Dick Tracy car, I started by gluing one side in place, letting that fully set, then moving to the second side and getting everything properly aligned before applying the final round of liquid cement. The few remaining gaps were filled with Vallejo putty, which works great for small seams like this. 10/10 for getting the body cleaned up, but minus several hundred for ease of assembling the interior. What you're supposed to do is glue the floor to the chassis, glue the fenders and body down, then add the door panels, seat, and dashboard from the top. Feeding everything in from the bottom was especially tricky given that the east was much wider at the top than the base, so it couldn't fit between the door panels after it was attached to the floor. What I ended up doing was gluing the door panels and dash in place, then taping the seat to the rear dash. This held it in place at the correct height, but it could still swing free enough to rest on the floor. Once it was all assembled, any small gap caused by the tape was completely hidden by the roof pillars. The grille/hood/side fit was about what I expected, but as with everything else by going slow and doing lots of test fits I was able to get it pretty close. The biggest help seemed to be thinning the fore and aft edges of the hood, which seemed to be hitting the cowl and grille shell enough to prevent it from seating properly.
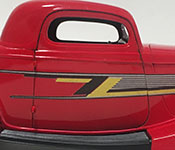
The body was painted TS-8 over white primer, and turned out glossy enough that I only gave it a token polishing. One of the taillights was missing from my new kit, so I took that from the old gluebomb, then finished it with a set of side graphics from Patto's Place and my own rear license plate.