Original Kit:
Dan Gurney's Olsonite Eagle
Made By:
MPC (kit #802)
Scale:
1/25

Other 1960s Movie Models
Other Racing Vehicle Models
Rush McLaren M23 The Circuit Wolf BMW 3.0 CSL
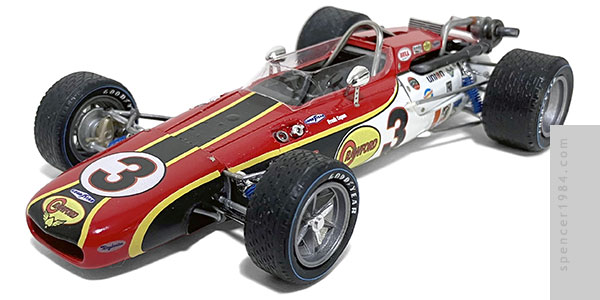
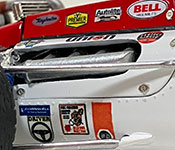
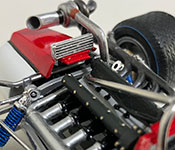
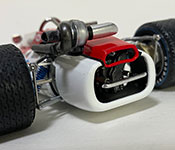
In the 1960s, it was pretty common for racing movies to use stock footage for wide shots and simply put the lead actor in a car that resembled one that was frequently at the front of the pack. It worked for "Mike Marsh" (James Caan) as not-Fred Lorenzen in Red Line 7000, "Steve Grayson" (Elvis) as not-Cotton Owens in Speedway, and "Frank Capua" (Paul Newman) as not-Bobby Unser in Winning.
When MPC first released their "Rislone Special" kit in 1968, it was a faithful replica of Bobby Unser's Indy-winning racer. The next year, the kit was modified into Dan Gurney's "Olsonite Eagle" V8 racer, making original Offy Turbo cars incredibly rare and expensive. Fortunately, a couple of aftermarket suppliers stepped up and offered transkits to recreate that original racer. I used the one from Replicas & Miniatures of Maryland, who also offered a set of corrected Indy racing tires.
The base kit was surprisingly good. I say "surprisingly" because the body was a complex arrangement of curved panels that all had to fit together: nose, top, each side, belly, two engine covers, and tail. Some kits make it hard for the hood to sit square, but this only needed a light sanding here & there plus a hair-thin shim on one side panel to make everything meet up nicely.
I filled in the pedal and rear bulkhead mount holes on the underside to smooth out the belly pan and removed the ejector pin marks on the sides near the engine, but otherwise the frame of the car went together straight out of the box with no trouble. The R&M Offy kit came with a unique bulkhead, but I found that by adjusting the engine mount holes I could use the one from the kit and that allowed me to use regular styrene cement for the assembly.
The engine was, as expected, beautifully cast in off-white resin. It required only minimal cleanup, and the worst of the work was cleverly placed in areas that would be hidden under other assemblies. There were dimples to drill out for ignition wires, which I took advantage of. I also scratch built a new pump for the front of the engine after I lost the original resin piece. Once assembled, it mated up to the kit transmission flawlessly.
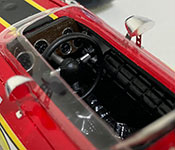
There wasn't much to the cockpit: a seat, a dashboard, a steering wheel, and a shifter. there was a problem with the instructions, where they show the dash going in upside down. It actually looks like it ought to go together that way: the tapered sides of the panel very nearly match the tapered sides of the tub. But if you put it in that way, there will be a gap between the dash and the body. If it goes in with the narrow side up, that narrow side perfectly fits the opening in the top of the body. The kit-supplied roll bar was broken, so I made a new one from stainless steel rod.
I assembled the body by starting with the top panel and then using that as a reference for everything else. Next were the sides, making sure that their leading edges matched the top panel and the vertical alignment was even on both sides. The nose and tail were next, and I'm happy to say that the R&M tail fit just as nicely as the rest of the panels. Finally, the engine covers went on. These helped me make the final adjustments to the intake and exhaust manifolds, since there were specific cutouts for each. The only body modifications I made were adding a filler panel behind the seat (the rear bulkhead didn't come up to meet the body), removing the stock mirror mounts, and widening the gap between the engine covers to account for the slightly thicker roll bar.
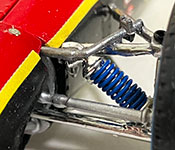
Once the major assembly work was done, all that was left was the suspension. There have been complaints by other modelers that the rear end was too wide, so I trimmed the bottom of the uprights so they could sit further in on the lower A arms. This meant the axle halfshafts were too long, so I replaced them with a single metal axle that went all the way from side to side. This not only solved the length issue, but it also made the rear end perfectly straight and quite a bit stronger. New boots were made by stacking different sizes of tiny O rings. I modified the upper A arms to fit, and scratch built new ends for the anti-sway bar so that everything fit together. All four corners received scratch built coilover shocks, and kit-supplied wheels were used with the R&M tires.
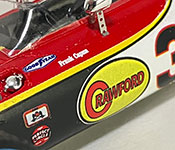
I painted the chassis, suspension, and engine parts with several shades of metallic paints. I painted the dash brown and added woodgrain, and the steering wheel, shifter, and gauges were done in black and silver. The body was painted Tamiya TS-26 Pure White, then masked off and painted TS-49 Bright Red. Indycals provided the top stripe and the black swoops for the sides, which were augmented with black vinyl stripes from Hasegawa and a little bit of paint touch-up. I made new decals for the "Crawford" sponsor logos and a few contingency sponsors, while the rest of them were pulled from various kits and aftermarket sets. Indycals also provided the Goodyear Blue Line decals for the tires. To make sure they as tightly and with as few wrinkles as possible, I cut across the decal on the sidewall opposite the "Goodyear" lettering (essentially turning the "O"-shaped decals into "C"-shaped decals). By going slowly, one side at a time, and using lots of Micro Sol and Micro Set, I was able to get all eight sidewalls done with only one lost. Fortunately I had bought a second set of Blue Line decals ahead of time for just such an emergency.
Only a couple of small details remained. I sourced the windshield from Classic Racing Resins, which was tricky to cut out but well worth the effort once it was in place. the sideview mirrors on the movie car had distinct perforated metal arms, and I was able to recreate this look by using more of the photoetched material that I first used on the Hell Comes to Frogtown machine gun. Finally, the resin intake for the turbocharger didn't look quite right. the casting was fine, it's just impossible to recreate a thin metal tube in scale without using thin metal. So that's exactly what I did, cutting and shaping a short section of aluminum tubing to fit the turbo.